Section 1: Choosing the Right Pressed Flower Journal
When you start on the journey of creating a pressed flower journal, the first step is to find the right type of journal. The market offers several different varieties, with various page textures and bindings that can impact the longevity and appearance of your precious flower pressings.
A top consideration should be for a journal that assures quality. The pages should be thick and sturdy to withstand the pressure and moisture associated with pressing flowers.
A standout option is the Flower Pressing Journal and Herbarium by Bogners. It is expressly designed for this purpose, featuring a robust construction, ample size and, most importantly, high-quality pages that will serve as an excellent home for your botanical treasures.
Section 2: Gathering Flowers
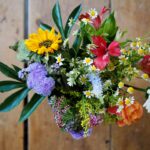
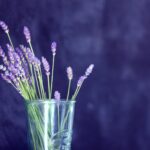
Now, it’s time to collect your flowers. You will find numerous species suitable for pressing, some of which grow abundantly across various parts of America. However, remember to gather with an eye towards sustainability to avoid disrupting fragile ecosystems.
Wildflowers such as daisies, violets, and buttercups are commonly found across the USA and press beautifully. The optimal time to collect flowers is in the morning after the dew has evaporated, as this will provide the best color preservation when pressing. Importantly, never over-harvest a single area. Leave plenty of flowers for the wildlife, and never pick any endangered species.
Section 3: The Pressing Process
With your flowers selected, it’s time to begin the pressing process. You’ll need pressing materials, mainly a flower press or heavyweight books and absorbent paper. Using recycled or FSC certified paper can be a great eco-friendly choice.
Place your flowers between two sheets of paper and then into your flower press. If using books, stack several on top for necessary pressure. Position the flowers so that they won’t overlap, then close the press or pile on the books. Ideally, you should leave your picks to dry for two to four weeks, checking periodically on the drying process.
Section 4: Mounting Flowers and Creating Artwork
Once your flowers are pressed and dried, carefully arrange them in your journal. Try creating visually pleasing patterns by playing with position and variety. Some people like to group similar species or colors together. Using a thin layer of glue, adhere your pressed flowers to the page. Be gentle to prevent damaging the delicate blossoms.
Section 5: Maintaining the Journal
To keep your pressed flower journal in top condition, handle it carefully. Ensure the flowers are fully dried before moving the journal to avoid any mold development. Ideally, store your journal in a low humidity place to ensure the longevity of your flower pressings. Regular cleaning of the journal can help prevent dust and debris from damaging your artworks.
In conclusion, creating a pressed flower journal is not only a wonderful way to appreciate nature’s beauty but also an eco-friendly craft that makes for a delightful pastime. So get out there, start exploring, and press some beauty into your life.